添加卡牌
代码 创建一个新的Cards文件夹方便管理,并创建新的cs文件,例如TestCard.cs。
1
2
3
4
5
6
7
8
9
10
11
12
13
14
15
16
17
18
19
20
21
22
23
24
25
26
27
28
29
30
31
32
33
34
35
36
37
38
39
40
41
42
43
44
45
46
47
48
using BaseLib.Abstracts;using BaseLib.Utils;using MegaCrit.Sts2.Core.Commands;using MegaCrit.Sts2.Core.Entities.Cards;using MegaCrit.Sts2.Core.GameActions.Multiplayer;using MegaCrit.Sts2.Core.Localization.DynamicVars;using MegaCrit.Sts2.Core.Models.CardPools;using MegaCrit.Sts2.Core.ValueProps;namespace Test.Scripts.Cards ;Pool(typeof(ColorlessCardPool)) ]public class TestCard : CustomCardModel private const int energyCost = 1 ;private const CardType type = CardType.Attack;private const CardRarity rarity = CardRarity.Common;private const TargetType targetType = TargetType.AnyEnemy;private const bool shouldShowInCardLibrary = true ;protected override IEnumerable<DynamicVar> CanonicalVars => [new DamageVar(12 , ValueProp.Move)];public TestCard () : base (energyCost, type, rarity, targetType, shouldShowInCardLibrary )protected override async Task OnPlay (PlayerChoiceContext choiceContext, CardPlay cardPlay )await DamageCmd.Attack(DynamicVars.Damage.BaseValue) this ) protected override void OnUpgrade ()4 );
CanonicalVars翻译是“规范值”,指卡牌的基础数值。添加一个DamageVar意为指定卡牌的基础伤害是多少,例如这里是12。
ValueProp表示数值的属性,例如ValueProp.Move表示是通过卡牌造成的伤害/格挡,ValueProp.Unpowered表示不受修正影响(如力量等),ValueProp.Unblockable表示伤害不可被格挡,ValueProp.SkipHurtAnim表示跳过受伤动画。这是一个bitflag类型的枚举,你可以进行组合,例如ValueProp.Unblockable | ValueProp.Unpowered,不可被格挡也不受修正影响。
尖塔2使用了async和await来控制效果逻辑顺序执行,比如选择一张牌时就一直await不让后续代码执行,和尖塔1的action类似的生态位。此处的OnPlay中写了一个造成单体伤害的指令。
想做什么样的卡牌,看原版代码哪张有类似的效果,参考即可。
添加一个Pool的attribute,并指定要添加的颜色卡池,然后会自动注册。
继承CustomCardModel而不是CardModel。
注意 :通过baselib添加卡牌,其id会变成{命名空间第一段大写}-{原卡牌id},例如namespace Test.Scripts;取TEST,原始卡牌id为TEST-CARD,是TestCard的大写snake-case,最后变成TEST-TEST_CARD。
卡图 可以通过在卡牌类中添加一个表达式属性来添加卡牌,这样的话可以任意指定位置:public override string PortraitPath => $"res://{modid}/images/cards/{GetType().Name}.png";,test/images/cards/TestCard.png。当然按你的喜好组织资源路径也可。
modId即为你{modId}.json中填写的。不是你的根目录,而是一个新文件夹。
卡图任意尺寸都可,且不需要裁剪,官方使用的尺寸是普通卡250x190,先古卡250x351。
1
2
3
4
5
6
7
8
9
10
11
12
13
14
15
16
17
public class TestCard : TestCardModel private const int energyCost = 1 ;private const CardType type = CardType.Attack;private const CardRarity rarity = CardRarity.Common;private const TargetType targetType = TargetType.AnyEnemy;private const bool shouldShowInCardLibrary = true ;protected override IEnumerable<DynamicVar> CanonicalVars => [new DamageVar(12 , ValueProp.Move)];public override string PortraitPath => $"res://test/images/cards/{nameof (TestCard)} .png" ;public TestCard () : base (energyCost, type, rarity, targetType, shouldShowInCardLibrary )
你也可以通过新增一个abstract类,避免每张卡都写一遍卡图路径,并且方便管理一些自定义功能。
1
2
3
4
5
6
7
8
9
10
public abstract class TestCardModel : CustomCardModel public override string PortraitPath => $"res://test/images/cards/{GetType().Name} .png" ;public TestCardModel (int energyCost, CardType type, CardRarity rarity, TargetType targetType, bool shouldShowInCardLibrarybase (energyCost, type, rarity, targetType, shouldShowInCardLibrary )public class TestCard : TestCardModel {}
文本 此外还需要本地化文件。创建一个{modId}/localization/{Language}/cards.json。
modId即为你{modId}.json中填写的。不是你的根目录,而是一个新文件夹。 Language可以写zhs表示简体中文。填写{CardId}.title(卡牌名)和{CardId}.description(卡牌描述):
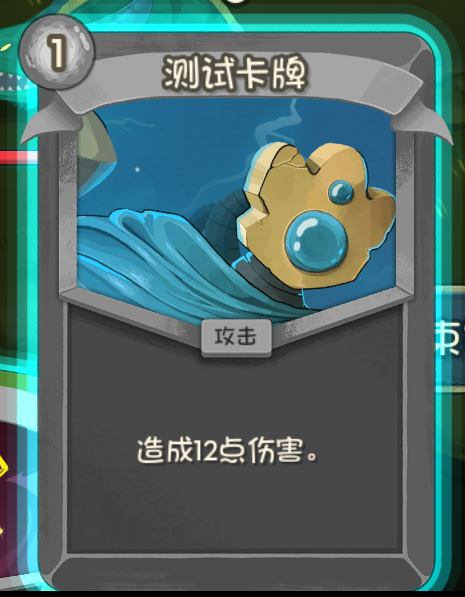
1
2
3
4
{ "TEST-TEST_CARD.title" : "测试卡牌" , "TEST-TEST_CARD.description" : "造成{Damage:diff()}点伤害。" }
{Damage:diff()}对应前面的DamageVar。
编译打包dll和pck后打开游戏。如果你在对应池子中看到卡牌说明成功了。如果没有任何卡牌(或者一张在左上角的卡牌)说明出问题了。
按~打开控制台输入card TEST-TEST_CARD获得这张卡。
最终项目参考 如果报错,回头看看。最终项目结构参考:
1
2
3
4
5
6
7
8
9
10
11
Test (你的项目文件夹)