01 卡图&皮肤替换
卡图替换 一个简单的方式是直接打patch,如下。这样只能替换原版卡图。
1 2 3 4 5 6 7 8 9 10 11 12 13 14 15 16 17 18 19 [HarmonyPatch(typeof(CardModel), nameof(CardModel.PortraitPath), MethodType.Getter) ]public static class CardModel_GetPortrait_Patch private static readonly Dictionary<string , string > CustomPortraits = new (StringComparer.OrdinalIgnoreCase)nameof(StrikeIronclad) ] = "res://test/images/image.png" ,nameof(DefendIronclad) ] = "res://test/images/image.png" ,static void Postfix (CardModel __instance, ref string __result )var className = __instance?.GetType().Name;if (string .IsNullOrEmpty(className)) return ;if (!CustomPortraits.TryGetValue(className, out var path)) return ;if (!ResourceLoader.Exists(path)) return ;
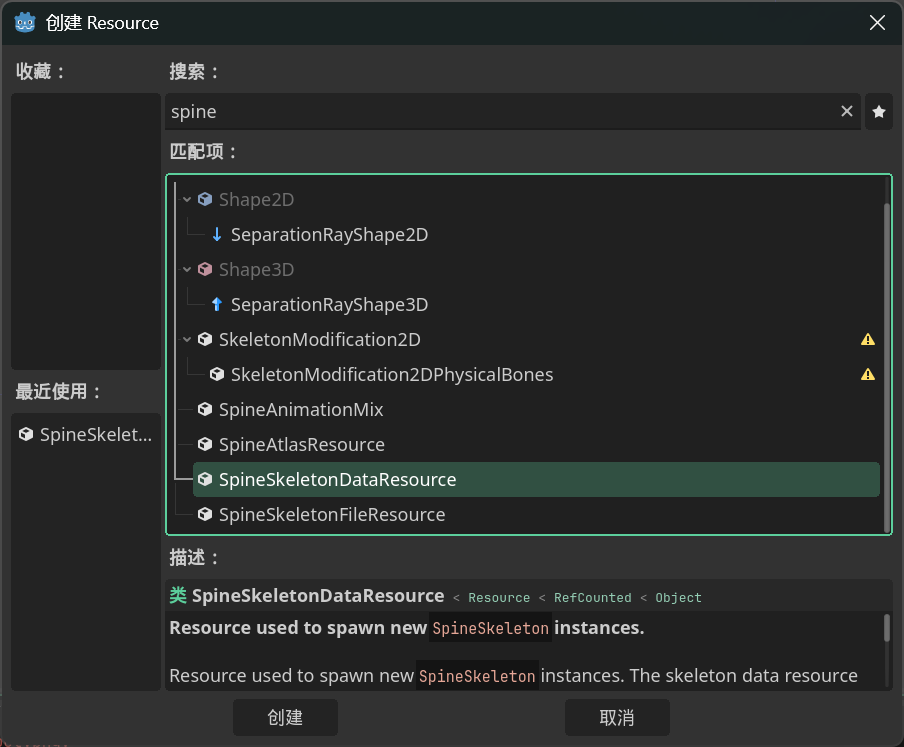
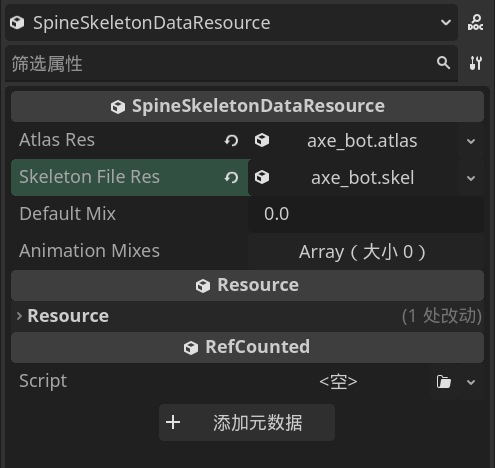
Spine导入&模型替换 尖塔使用4.2.43版本的Spine,在这之下版本的不能直接使用。(神秘链接或网盘:https://github.com/wang606/SpineSkeletonDataConverter )
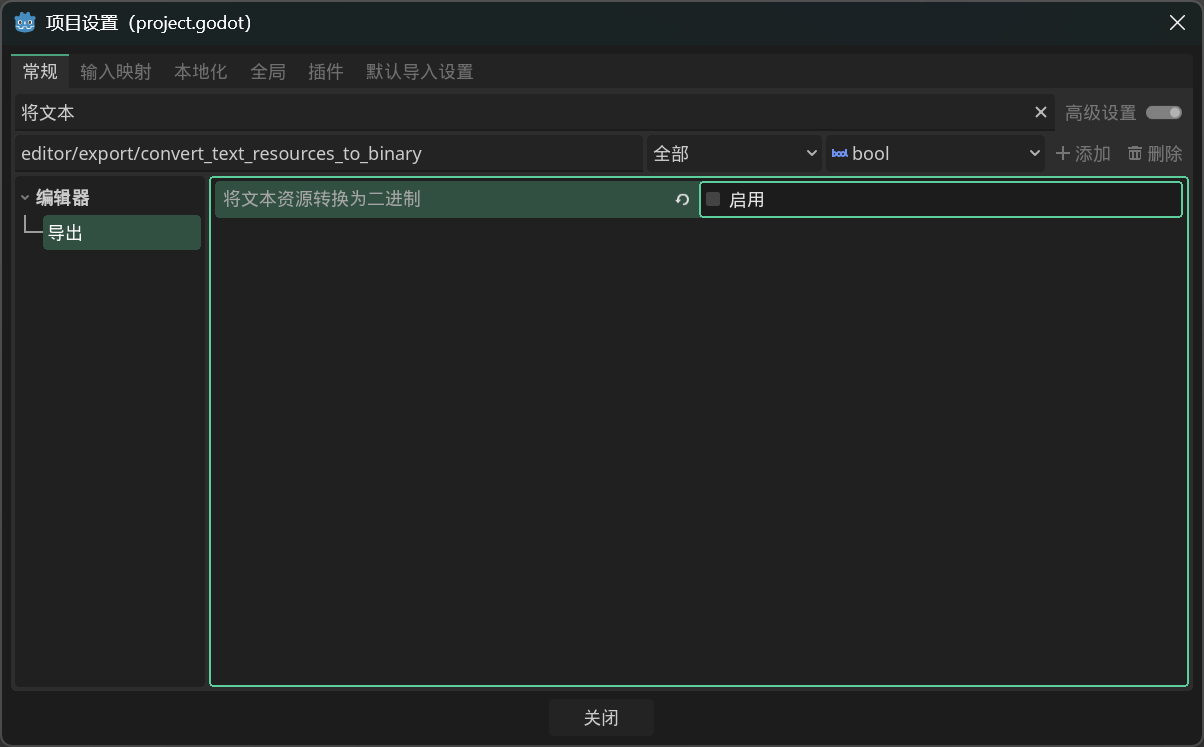
打开项目→项目设置,把将文本资源转换为二进制禁用。
然后可以参考这段替换角色:
1
2
3
4
5
6
7
8
9
10
11
12
13
14
15
16
17
18
19
20
21
22
23
24
25
26
27
28
29
30
31
32
33
34
35
36
37
38
39
40
41
42
43
44
45
46
47
48
49
using System;using Godot;using HarmonyLib;using MegaCrit.Sts2.Core.Bindings.MegaSpine;using MegaCrit.Sts2.Core.Modding;using MegaCrit.Sts2.Core.Nodes.Combat;namespace Test.Scripts ;ModInitializer("Init" ) ]public static class Entry private const string TargetCharacterId = "IRONCLAD" ;private const string SkinPath = "res://spineskins/test_skin.tres" ;private const string HarmonyId = "sts2.reme.spineskintemplate" ;private static Resource? _skinData;public static void Init ()null , ResourceLoader.CacheMode.Reuse);new Harmony(HarmonyId).PatchAll();HarmonyPatch(typeof(NCreature), nameof(NCreature._Ready)) ]private static class NCreature_Ready_Patch private static void Postfix (NCreature __instance )if (_skinData == null ) return ;var player = __instance?.Entity?.Player;if (player == null ) return ;if (!string .Equals(player.Character.Id.Entry, TargetCharacterId, StringComparison.OrdinalIgnoreCase))return ;var visuals = __instance.Visuals;if (visuals?.Body == null || !visuals.HasSpineAnimation) return ;new MegaSprite(visuals.Body).SetSkeletonDataRes(new MegaSkeletonDataResource(_skinData));
任意模型替换思路
只需patchCharacterModel.CreateVisuals返回继承NCreatureVisuals自制节点,就可以使用任意的场景替换人物。
创建一个继承NCreatureVisuals的类,把它挂载到你新建的Node2D场景中。参考添加新人物的自定义人物背景这一节。现在不需要脚本了该场景需要有唯一化命名(%)的Visuals(Node2D),Bounds(Control),IntentPos(Marker2D),CenterPos(Marker2D)。
如果想使用3d模型,新建subviewportcontainer→subviewport的层级结构,然后在subviewport中添加camera3d和任意3d模型,在3d视图中调整视角至2d视图正常显示。最后设置subviewport的transparent为true。